How To Optimize Images For SEO? Easy Steps To Improve Site Speed And Ranking
Jul 15, 2025

You must have heard the phrase “pin a post” multiple times. But what does that actually mean?
Pinning a post on social media means that you are saving it to be one the top of the page. One of the best ways to make your post stand out for your target audience to take a look at it anytime they visit your page is by pinning it.
Many social media sites are available on the internet. Some of them are Facebook, Pinterest, Instagram, and Reddit, to name some.
On all these platforms, if there is something that you can do to make your posts easily found by the followers or audience, then it is to pin them at the top.
If you have been looking for ways of pinning your post on Facebook, then this is the end of your search. Keep reading to find out more…
Facebook is a great way of connecting with people and also to promote about your the products and services of your business. This is because the platform is one of the best sites for social media marketing.
With more than 500 million active users on this platform every day, it is a guarantee that you will be able to reach your target audience through Facebook.
Many people use Facebook to announce an event and update their audience about the changes or other important announcements through their page. Pinning the post or the event is a great way of highlighting your posts on the app pr platform.
Want to know how to pin a post on Facebook page? You have come to the right place.
Follow the steps mentioned below to successfully pin a post on your Facebook page:
![]() Open the Facebook page.
Open the Facebook page.
![]() Look for the post that you want to pin.
Look for the post that you want to pin.
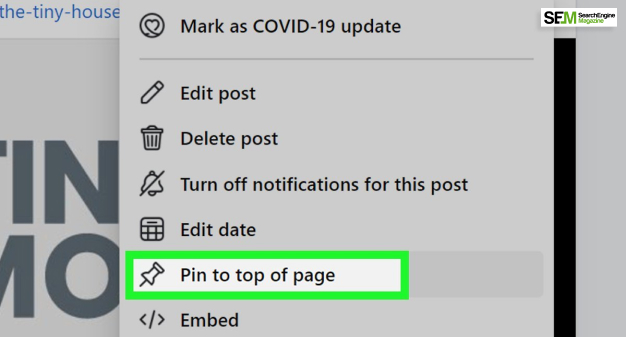
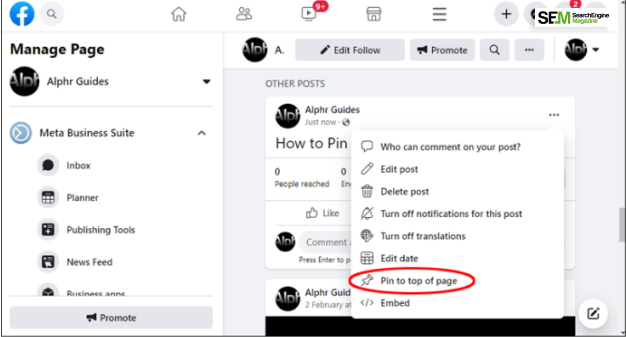
![]() Click on the setting option of the post. These are the vertical three dots that are located at the top right corner of the post.
Click on the setting option of the post. These are the vertical three dots that are located at the top right corner of the post.
![]() Select the option “Pin Post” or “Pin to Top of Page”.
Select the option “Pin Post” or “Pin to Top of Page”.
That is all. You will pin your post on the Facebook page.
Remember that you are pinning a post to make it more visible to the audience. You are doing that to ensure that your audience does not get lost in the neverending list of posts.
You can unpin the posts when you feel like you find a more important post that needs attention.
If you want to unpin the post, follow the steps:
![]() Open your Facebook page.
Open your Facebook page.
![]() Go to the post that you want to unpin.
Go to the post that you want to unpin.
![]() Click the three dots or the settings section located at the top-right corner of the post.
Click the three dots or the settings section located at the top-right corner of the post.
![]() Select the “Unpin from Top of page” or “Unpin Post” option.
Select the “Unpin from Top of page” or “Unpin Post” option.
That is it. You will unpin your post. It will no longer appear at the top of the page. You are ready to pin a new and more important post.
| Fun Fact: Did you know “how to pin a post on Facebook 2021” was one of the most searched queries on the internet in 2021. |
Facebook is a very large platform. With all the posts that you make every day on a regular basis, it is only natural for your followers on the platform to lose sight of the important announcements or news.
If you want to make sure that our audience is always aware of the events taking place or stay updated about the changes that are supposed to take place, pin a post.
By pinning a post, you ensure that these posts or events always appear at the top of the page. In addition, if you pin a post on any social media platform, you are making sure that your audience is able to find it whenever they enter your page.
Once you think that you no longer need that particular post to be on top or when you find another post that needs more attention, you can just unpin the previous post.
In other words, pinning an article is totally based on priority. Pin a post when you want your audience to focus on it more, and then unpin it when it is no longer required.
So by unpinning the post and panning a new post, you make sure that your audience is always updated.
If you have a business page on the Facebook platform and want to pin a post on the Facebook business page, then you need to follow the steps:
Click on the three dots that are placed at the top-right corner of the post.
Select the option “Pin Post”.
That’s it. Facebook will pin your post to the top of the business page on the Facebook platform.
If you want to pin a post on Facebook, then all you need to do is click on the top-right corner of the post, where you will see the three dots. Once you click on this, the drop-down menu will show you the option to “Pin Post.” Click on this option, and this post will be pinned.
If you are having a problem pinning a post on the Facebook page through the Facebook App on your smartphones, either Android or iOS, you should try to do that through the web browser.
You can use any web browser, Google Chrome, Yahoo, Firefox, or Bing, for this purpose. Log into to Facebook page and try selecting the “Pin Post” option from the three dots that is located at the top right corner of your post.
Social media is a huge place, and it is a great site for making your audience aware of your latest events and thoughts.
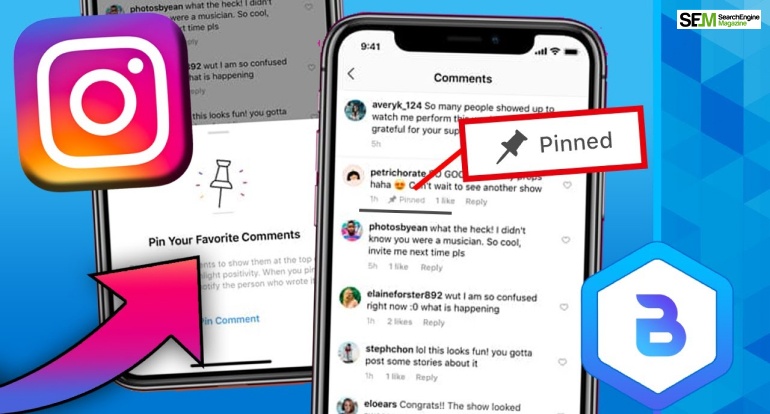
If you want to make sure that your audience, followers, or subscribers get to see your important posts and events all the time when they visit your profile, pinning your post or event may be the best way to do that. You can even pin comments on Instagram, Facebook, Youtube, and Twitter.
In case you were looking for how to pin a post on Facebook, I hope this article has been of help to you. If there are some other queries, feel free to let me know in the comments section below.
Read Also:
Ankita Tripathy loves to write about food and the Hallyu Wave in particular. During her free time, she enjoys looking at the sky or reading books while sipping a cup of hot coffee. Her favourite niches are food, music, lifestyle, travel, and Korean Pop music and drama.
View all Posts
How To Optimize Images For SEO? Easy Steps To...
Jul 15, 2025
Quickwin: Your Gateway To Premium Online Ente...
Jul 12, 2025
Top 7 HVAC Marketing Mistakes That Are Tankin...
Jul 12, 2025
8 Top AI Market Research Tools For Fast And A...
Jul 12, 2025
How A Smart Seo Agency Uses Guest Posting To ...
Jul 10, 2025